An auto-siphon is one of the most useful pieces of homebrewing equipment.
It lets you transfer beer, cider, mead, wine, and other fermented drinks without manually starting a siphon.
It also has more parts than a simple piece of tubing.
Beer, yeast, fruit, and other residue can collect inside the siphon body, piston, seals, and tip. If you do not clean these parts, microorganisms can remain inside the siphon and contaminate future batches.
The cleaning process is simple: Disassemble → rinse → clean → rinse → dry → sanitize
The most important rule is simple: Clean the auto-siphon immediately after use.
What You Need
You need:
- Clean water
- Brewery cleaner
- PBW or a similar cleaner
- OxiClean Free as a lower-cost alternative
- Soft cleaning brush
- Small parts brush
- Clean container or bucket
- No-rinse sanitizer
- Clean drying rack
You do not need a special auto-siphon cleaning machine.
A tubing brush can be useful for the siphon tube.
Understand the Parts
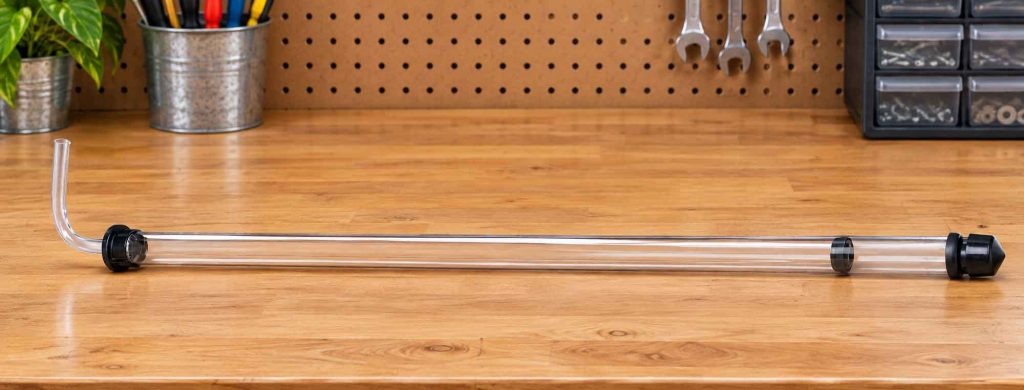
An auto-siphon normally contains:
- Siphon body
- Piston
- Piston seal
- Siphon tip
- Valve or foot
- Tubing
- Other small fittings
The exact design depends on the manufacturer. Some auto-siphons have a removable piston. Some models have additional seals or fittings. Do not force a part apart – especially if you’re not sure how you’ll get it back together.
Follow the manufacturer’s instructions when you disassemble the siphon.
Clean the Auto-Siphon Immediately
The best time to clean an auto-siphon is immediately after the transfer.
Do not leave beer or wine inside the siphon. Do not allow yeast or fruit residue to dry inside the tube. Dried residue is much harder to remove.
A quick rinse immediately after use can prevent a difficult cleaning job.
Step 1: Disassemble the Auto-Siphon
Take the auto-siphon apart as far as the manufacturer allows.
Remove the:
- Tubing
- Siphon tip
- Piston
- Piston seal
- Other removable components
Keep track of the small parts. A small container can help prevent parts from getting lost. Do not remove a seal if the manufacturer does not intend for you to remove it. Some seals can become damaged during unnecessary disassembly.
Step 2: Rinse the Parts
Rinse every part with clean water. Run water through the siphon body. Flush the tubing. Rinse the piston. Rinse the siphon tip.
Pay special attention to:
- Seals
- Joints
- Small openings
- The inside of the piston
- The bottom of the siphon
Continue until you remove the visible beer, wort, yeast, or fruit. Warm water can help. Do not use water that is hotter than the temperature rating of the equipment.
Step 3: Prepare the Cleaner
PBW is an excellent choice for cleaning an auto-siphon. OxiClean Free can also work well. A plain, unscented powdered dish detergent can work for some cleaning applications. Do not use scented household cleaners, as you do not want fragrance or other unnecessary additives on equipment that contacts beer.
Mix the cleaner according to the product instructions. A stronger cleaner solution is not always better. Follow the recommended concentration.
Step 4: Clean the Siphon Body
Place the siphon body in the cleaning solution.
Fill the inside with cleaner. Allow the cleaner to contact all internal surfaces. If possible, move the piston through the siphon body while it is filled with cleaning solution.
This helps move cleaner across the internal surfaces. Do not force the piston. If it does not move freely, stop and inspect it. There may be residue inside the piston assembly.

Step 5: Clean the Piston
The piston is one of the most important parts to clean.
Residue can collect around the seal. Clean around the entire seal. Use a soft brush if needed – do not use an abrasive brush.
A damaged seal can cause the siphon to leak or stop working correctly. If the seal is removable, clean it separately. If it is not removable, work cleaner around the entire seal.
Step 6: Clean the Siphon Tip
Remove the siphon tip if possible. Clean the inside and outside. Small pieces of fruit or yeast can collect in the tip.
A small soft brush can help remove material from small openings. Do not use a sharp object to scrape the tip, as you can damage the plastic.
Step 7: Clean the Tubing
The tubing needs its own cleaning process.
Rinse it first. Then run cleaner through the entire length of the tubing. Fill the tubing with cleaner and allow it to soak for the recommended contact time.
Flush it with clean water. Inspect the inside. If the tubing remains dirty, clean it again – we’ve got an article on that. If you cannot remove the residue, replace the tubing. Tubing is inexpensive compared with a batch of beer.
Step 8: Rinse Everything
After cleaning, rinse every component with clean water.
Run water through:
- Siphon body
- Piston
- Siphon tip
- Tubing
- Other internal components
Continue until you cannot see cleaner residue. Do not assume that sanitizer can replace this step. Sanitizer is not designed to remove heavy organic residue.
Step 9: Inspect the Parts
Inspect the components under good light.
Look for:
- Dried residue
- Cloudy material
- Yeast deposits
- Fruit particles
- Scratches
- Cracks
- Damaged seals
- Persistent stains
If you see residue, clean the part again. If a component is damaged, replace it.
Step 10: Allow the Parts to Dry
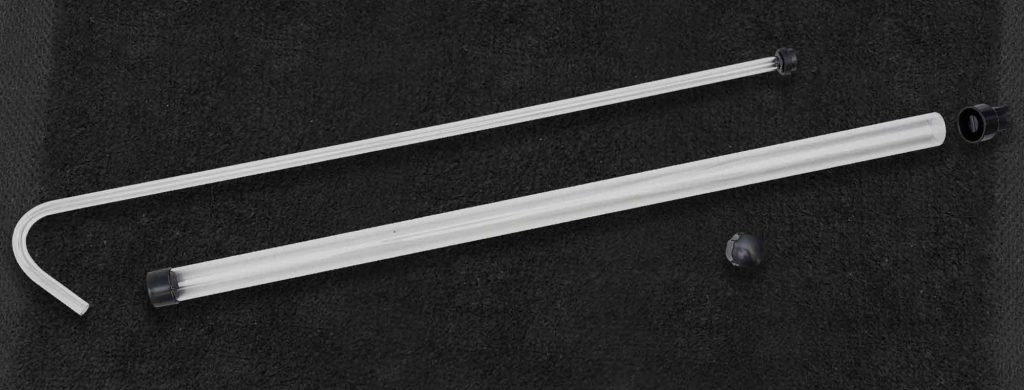
Place the components on a clean drying rack. Allow water to drain from the siphon body and tubing. Keep the parts in a clean location.
Do not store wet tubing in a sealed container, as moisture trapped inside the tubing can create an environment where microorganisms can grow. Allow the equipment to dry completely before storage.
Step 11: Sanitize Before Use
Cleaning and sanitizing are different processes. Cleaning removes dirt and organic material. Sanitizing reduces microorganisms.
Before you use the auto-siphon for a beer, cider, mead, or wine transfer, sanitize all parts that will contact the drink. Prepare the sanitizer according to the manufacturer’s instructions.
- Fill the siphon body with sanitizer.
- Run sanitizer through the piston.
- Run sanitizer through the tubing.
- Sanitize the siphon tip.
- Make sure the sanitizer contacts all surfaces.
If you use a no-rinse sanitizer, do not rinse it afterward unless the product instructions tell you to rinse.
Do Not Blow Through the Siphon
Do not start an auto-siphon by blowing into it. Your mouth contains microorganisms. This can contaminate the equipment.
The purpose of an auto-siphon is to start the transfer without this type of contact.
Do Not Use Lubricant Without Checking the Manufacturer
The piston needs to move freely. This does not mean that you should automatically add lubricant. Some lubricants can damage plastic or rubber components. Some lubricants are not suitable for contact with food or beverages.
If your auto-siphon needs lubrication, use only a product that the manufacturer recommends. A clean seal should normally operate without excessive lubrication.
Common Auto-Siphon Problems
The Siphon Will Not Start
Check the following:
- Piston position
- Siphon tip
- Seal
- Tubing connection
- Air leaks
Residue around the piston can prevent the siphon from working correctly.
Disassemble and clean the piston assembly.

The Siphon Loses Its Prime
An air leak can interrupt the siphon.
Check:
- Tubing connections
- Piston seal
- Cracks
- Loose fittings
- Damaged components
A damaged seal can allow air to enter the system. Replace damaged parts.
The Piston Is Difficult to Move
Do not force it.
Remove the piston if the manufacturer allows it. Clean the piston and seal. Remove dried residue. Inspect the seal for damage. If the problem continues, replace the damaged component.
The Siphon Has a Bad Smell
A persistent smell can indicate residue inside the equipment.
Disassemble the siphon and soak the components in an appropriate brewery cleaner. Flush all internal surfaces and rinse thoroughly.
Allow the components to dry. If the smell remains after thorough cleaning, replace the affected component.
How Often Should You Clean an Auto-Siphon?
Clean the auto-siphon after every use. Do not wait until you notice a problem. Sanitize it before every transfer.
This includes transfers of:
- Beer
- Cider
- Mead
- Wine
- Fruit wine
Even if the next batch uses the same type of drink, clean the siphon. Different batches can contain different microorganisms.
Should You Replace an Auto-Siphon?
You do not need to replace an auto-siphon on a fixed schedule. Replace it when you cannot clean it properly or when a component becomes damaged.
Replace the siphon if you find:
- Cracks
- Deep scratches
- Damaged seals
- Persistent contamination
- Permanent buildup
- Parts that no longer fit correctly
If only the seal or tubing is damaged, you may be able to replace that part instead of the entire siphon.
Plastic Scratches Matter
Do not use abrasive pads on plastic auto-siphons. Scratches create small areas where residue can remain.
Use a soft cloth or soft brush. If the inside of the siphon body becomes heavily scratched, replacement is usually better than trying to polish it.

PBW vs. OxiClean Free
Both can be useful.
PBW is a purpose-made brewery cleaner and is an excellent choice for difficult residue.
OxiClean Free is an inexpensive oxygen-based alternative that many homebrewers use for soaking and cleaning.
The cleaner is not the only important factor. The process matters. The cleaner must reach the entire inside of the siphon and the parts must be rinsed thoroughly.
The equipment must be inspected. Then the equipment must be sanitized before use.
A Simple Auto-Siphon Cleaning Routine
After every use:
- Take the auto-siphon apart.
- Rinse all parts.
- Prepare the cleaner.
- Fill the siphon body with cleaner.
- Run cleaner through the piston.
- Soak the parts.
- Clean the siphon tip.
- Clean the tubing.
- Rinse everything with clean water.
- Inspect the parts.
- Allow the parts to dry.
- Store the parts in a clean location.
- Sanitize all parts before the next use.
The Most Important Rule
An auto-siphon can transfer clean beer. It can also transfer contamination. The difference is usually the cleaning process.
Do not focus only on the large plastic tube. The piston, seal, siphon tip, tubing, and small fittings all need attention. A few minutes of cleaning after every transfer can keep the siphon working correctly and protect your beer.
Disassemble. Rinse. Clean. Rinse again. Dry. Sanitize before use.