A keg is easy to clean if you clean it after every batch.
The basic process is:
- Empty the keg.
- Rinse it.
- Take apart the parts that need cleaning.
- Clean the keg and parts.
- Rinse away cleaner.
- Inspect the seals and fittings.
- Reassemble the keg.
- Sanitize it before the next use.
The most important rule is:
Cleaning removes grime. Sanitizing reduces microorganisms.
You need to do both. A keg that looks clean is not necessarily sanitary.
What Parts of a Keg Need Cleaning?
A keg has more parts than the large stainless-steel container suggests.
A typical Cornelius keg has:
- Keg body
- Lid
- Lid O-ring
- Gas post
- Liquid post
- Gas dip tube
- Liquid dip tube
- Post O-rings
- Poppet valves
- Dip-tube O-rings
- Pressure-relief valve
The beer also travels through the liquid post, poppet, dip tube, disconnect, beer line, and faucet. Cleaning only the inside of the keg is not enough.
Beer can hide in any of these parts.
Clean the Keg After Every Batch
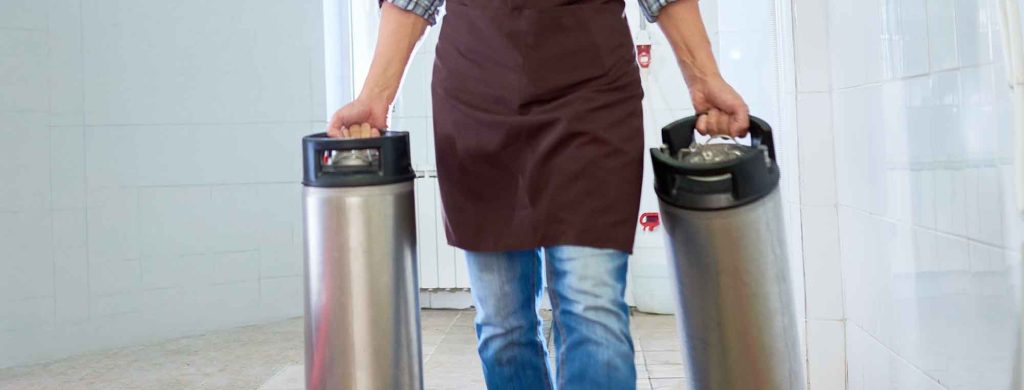
Do not let beer residue dry inside the keg. Dried beer is much harder to remove.
As soon as you empty a keg:
- Rinse out the remaining beer.
- Rinse the inside with warm water.
- Clean the keg.
- Clean the posts and removable parts.
- Rinse everything.
- Store the keg clean.
If you have several kegs, this becomes much easier if you clean each one immediately after it kicks.
Cleaning vs. Sanitizing
These jobs are different.
Cleaning
Cleaning removes:
- Beer residue
- Yeast
- Hop particles
- Protein
- Sugar
- Dried deposits
- Biofilm
A cleaner helps break this material down.
Sanitizing
Sanitizing reduces microorganisms to a level appropriate for brewing. A sanitizer does not replace cleaning. If a keg contains dried beer residue, putting sanitizer into it does not magically remove the residue.
Related: What is the difference between cleaning and sanitizing?
What Cleaner Should I Use?
Several cleaners work well for keg cleaning.
Common options include:
- PBW
- OxiClean Free
- Brewery-specific alkaline cleaners
- Other unscented brewery cleaners
For normal homebrew use, an alkaline brewery cleaner is usually a good choice. PBW is popular because it works well on organic brewing residue and is designed for brewing equipment. OxiClean Free can also work well for soaking equipment.
If you use a household cleaner, avoid products containing:
- Fragrance
- Dyes
- Oils
- Antibacterial additives
- Other ingredients that can remain on brewing equipment
You do not want your next beer tasting like laundry detergent.
How Strong Should the Cleaner Be?
Follow the cleaner manufacturer’s instructions. More concentrated cleaner is not always better.
A stronger solution can:
- Waste cleaner
- Require more rinsing
- Leave more residue
- Increase the risk of damaging some equipment
Use the recommended concentration.
Water temperature also matters, as many brewery cleaners work better in warm or hot water. Do not assume that boiling water is necessary.
Should I Take the Keg Apart?
Yes! Just, make sure you remember which parts go where.
You do not need to completely disassemble every keg after every batch, but you should regularly take apart the parts where beer can hide.
For routine cleaning, the most important teardown is usually:
Remove the posts and dip tubes.
This gives you access to the parts that carry beer and gas. You should also remove the lid and inspect its O-ring. The pressure-relief valve should be inspected and cleaned as needed.
Why Are the Posts So Important?
The keg posts are easy to ignore. They are also excellent places for dried beer and yeast to hide.
The liquid post is especially important because beer passes through it.
The gas post can also collect residue.
Unscrew the posts with the appropriate wrench. Keep track of which post goes where. Gas and liquid posts are not always interchangeable. Some keg designs use different thread patterns or post markings.
Clean the Dip Tubes
The dip tubes are long, narrow tubes.
The liquid dip tube carries beer from the bottom of the keg to the liquid post. The gas dip tube, if present, carries CO₂ from the gas post into the keg (not all kegs have them). Remove dip tubes during a thorough cleaning.
Flush cleaner through them. Rinse them thoroughly.
Inspect them for:
- Dried beer
- Hop particles
- Yeast
- Scratches
- Cracks
- Blockages
A small tube can hide a surprising amount of residue.
Clean the Poppets
The poppet is the spring-loaded valve inside the keg post. It allows the disconnect to open the keg’s gas or liquid path. Beer can collect around the poppet, so remove it when doing a deeper cleaning.
- Soak it in cleaner.
- Rinse it thoroughly.
- Inspect the spring and sealing surface.
- Make sure it moves freely when you reinstall it.
Do not lose the small parts. Keg hardware has a talent for disappearing down drains!
Clean the Keg Lid
Remove the lid. Clean both sides.
Pay attention to:
- The underside
- The lid groove
- The pressure-relief valve
- The O-ring
Dried krausen, foam, and yeast can collect around the lid. The lid O-ring also deserves inspection.

Do I Need to Replace the O-Rings?
Not every time. But O-rings are consumable parts.
Replace them when they are:
- Cracked
- Cut
- Swollen
- Hard
- Deformed
- Sticky
- Damaged
- Holding unwanted odors
- No longer sealing properly
A keg can be perfectly clean and still leak because of a bad O-ring. It is useful to keep spare O-rings on hand – they’re cheaper than losing a batch of beer.
Why Do Keg O-Rings Sometimes Smell?
Rubber and silicone can absorb aromas. This can become noticeable after brewing strongly flavored beer. Ask me sometime about my dedicated root beer keg.
An O-ring from a heavily hopped IPA may retain hop aroma. An O-ring used with a spiced cider may retain spice character. If you move the same keg between strongly flavored beverages, persistent odors can become a problem.
You can replace the O-rings. Some brewers keep separate O-rings or even separate kegs for particularly strong flavors.
What Is Keg Lube?
Keg lube is a food-safe lubricant used on keg O-rings and other appropriate seals. It helps the O-ring slide into place without twisting or pinching. It can also help the seal seat properly.
Use only a lubricant intended for food-contact brewing equipment. Do not grab a random household grease!
Where Should I Use Keg Lube?
Use a very thin film on appropriate O-rings.
Common places include:
- Lid O-ring
- Dip-tube O-rings
- Post O-rings
A small amount is enough. You do not need to coat the entire keg. You also do not need to cover the O-ring in grease. The goal is to lubricate the seal, not marinate it.
What Does Keg Lube Actually Do?
Keg lube helps the O-ring move into position.
This is especially useful for:
- Lid O-rings
- Dip tubes
- Disconnect-related seals
- Other moving or compressed seals
A dry O-ring can twist or roll as you install a component. A thin film of keg lube reduces friction. This can help prevent leaks caused by a poorly seated seal. If you ever find you’re leaking CO₂ from a keg lid, it’s likely that a little keg lube on the O-ring will fix it right up.
Can Keg Lube Fix a Bad O-Ring?
No. Keg lube can help a good O-ring seal.
It cannot repair an O-ring that is:
- Cracked
- Cut
- Permanently deformed
- Swollen
- Damaged
Replace damaged O-rings. Do not use extra lubricant as a substitute for replacement.
Do Not Use Too Much Keg Lube
More is not better. Excess lubricant can collect dirt and brewing residue, as well as make cleaning more difficult. Apply a thin, even film. If the O-ring looks heavily coated, you probably used too much.

How Do I Clean a Keg?
Here is a good basic cleaning process.
Step 1: Empty the Keg
Remove all remaining beer.
If the keg is still pressurized, release the pressure safely.
Do not remove keg hardware from a pressurized keg.
Step 2: Rinse Immediately
Rinse the keg with warm water.
Try to remove as much beer residue as possible before adding cleaner.
Step 3: Remove the Lid
Take off the lid.
Remove the lid O-ring if you are doing a thorough cleaning.
Inspect it.
Step 4: Remove the Posts
Use the correct wrench to remove the gas and liquid posts.
Remember which one is which.
Step 5: Remove the Dip Tubes
Pull out the gas and liquid dip tubes.
Remove their O-rings if your keg design uses them.
Step 6: Remove the Poppets
Remove the poppets from the posts.
Keep track of the parts.
Step 7: Make a Cleaning Solution
Mix your brewery cleaner according to the manufacturer’s instructions.
Warm water is often useful.
Step 8: Soak the Parts
Put the removable parts into the cleaning solution.
Soak them long enough to loosen dried material.
Use an appropriate brush where necessary.
Step 9: Clean the Keg
Add cleaning solution to the keg.
Close the lid.
You can gently shake or roll the keg to contact the solution with the interior.
Let it soak if needed.
Step 10: Clean the Posts and Tubes
Use a suitable brush to clean the posts and dip tubes.
Flush the tubes with cleaner.
Make sure cleaner reaches every internal passage.
Step 11: Rinse Everything
Rinse the keg and parts thoroughly with clean water.
Do not leave cleaner behind.
Step 12: Inspect Everything
Look at:
- O-rings
- Poppets
- Posts
- Dip tubes
- Lid
- Pressure-relief valve
Replace anything damaged.
Step 13: Lubricate the O-Rings
Apply a thin film of food-safe keg lube where appropriate.
Step 14: Reassemble the Keg
Install:
- Dip tubes
- Poppets
- Posts
- O-rings
- Lid
Do not overtighten the posts. They need to seal. They do not need to be hand-welded together.
Do I Need to Brush the Inside of the Keg?
Usually, a good soak and rinse can handle normal residue.
If something is stuck to the stainless steel, brush it. Use a soft or appropriate brewing brush. Avoid aggressive abrasive materials that can scratch the stainless steel, as scratches can create places for residue and microorganisms to collect.
What If There Is Dried Krausen in the Keg?
Soak it.
Do not immediately attack it with a metal scrubber. An alkaline cleaner and warm water can soften dried fermentation residue.
Give the cleaner time to work, then use an appropriate brush if necessary. The same applies to dried yeast and hop residue.
What If the Keg Has a White or Brown Film?
That usually means you have residue that needs cleaning.
Do not simply sanitize over it.
Soak the keg in an appropriate cleaner. If necessary, repeat the cleaning process. Persistent mineral deposits may require a different cleaning approach than normal organic beer residue.

What If the Keg Smells?
First, clean it thoroughly.
Pay particular attention to:
- Lid O-ring
- Post O-rings
- Poppets
- Dip tubes
- Pressure-relief valve
These small parts can retain odors.
If the keg itself is clean but the smell remains, replace the affected O-rings. Some strong beer aromas can be difficult to remove completely.
How Often Should I Replace Keg O-Rings?
There is no fixed schedule. Replace them when they stop doing their job.
A well-maintained O-ring can last a long time. Replace it sooner if it becomes damaged or absorbs an odor that you cannot remove.
Keep spare sets available. Again, O-rings are cheap compared with a batch of beer.
Should I Replace All the O-Rings at Once?
You can. But you do not have to.
If one O-ring is damaged, replace that O-ring. If a keg has old, hardened, or heavily scented seals, replacing the whole set can be a simple way to reset the keg.
Different keg manufacturers and replacement kits can use different O-ring sizes. Make sure you buy the correct set for your keg.
What About the Pressure-Relief Valve?
The pressure-relief valve is another place that can collect residue.
Inspect it during a thorough teardown. Make sure it is clean and can operate correctly. If it is damaged or does not function correctly, replace it.
Do not modify or disable a keg’s pressure-relief system!
Do I Need to Remove the Posts Every Time?
Not necessarily. For a keg that contained clean beer and was immediately rinsed, a basic cleaning routine can be quick. However, regular deeper cleaning should include the posts, poppets, and dip tubes.
A good practical routine is:
- Every batch: rinse, clean, and inspect.
- Regularly: remove the posts and dip tubes and clean everything individually.
- Whenever there is a problem: completely tear down the keg and inspect every seal and passage.
How Do I Sanitize a Keg?
After cleaning and rinsing, sanitize the keg before filling it with beer. Use a no-rinse brewing sanitizer according to its instructions.
Sanitize:
- Keg interior
- Lid
- Posts
- Dip tubes
- Poppets
- Any part that will contact the beer
- Liquid disconnect
- Transfer equipment
Keep the equipment protected from contamination after sanitizing. Do not clean a keg and then leave it sitting open for days before filling it.
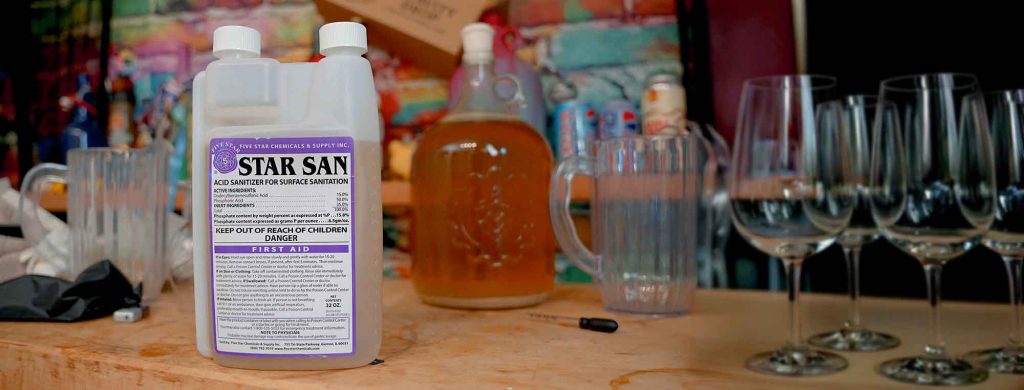
Can I Sanitize the Keg With Starsan?
Yes. A no-rinse acid sanitizer such as Star San is commonly used for brewing equipment. Follow the product instructions for concentration and contact time.
Remember: Star San sanitizes. It is not a replacement for removing heavy beer residue. If the keg is dirty, clean it first.
Can I Store a Clean Keg Wet?
It is usually better to store equipment clean and protected from contamination.
If you store a keg wet, avoid leaving stagnant water sitting inside it for long periods. A clean, dry keg is easy to inspect before its next use. Before filling it, clean or rinse as appropriate and sanitize it.
Personally, I sanitize the sealed and pressurized keg, then push the sanitizer out through a picnic tap using CO₂. That way, my keg is sealed and sanitized as it waits for its next batch.
The Easy Post-Batch Keg Routine
You do not need to turn every keg cleaning into a laboratory procedure.
After the keg kicks:
- Release pressure.
- Remove the remaining beer.
- Rinse the keg.
- Add warm cleaner.
- Soak.
- Rinse thoroughly.
- Clean the lid and removable parts.
- Inspect the O-rings.
- Reassemble.
- Store clean.
- Sanitize before the next fill.
Then do a more complete teardown periodically.
A Deep-Clean Keg Routine
When you want to clean everything:
- Depressurize the keg.
- Remove the lid.
- Remove all O-rings.
- Remove gas and liquid posts.
- Remove poppets.
- Remove dip tubes.
- Soak all parts in brewery cleaner.
- Brush and flush the internal passages.
- Clean the keg body.
- Rinse everything thoroughly.
- Inspect every part.
- Replace damaged O-rings.
- Apply a thin film of keg lube.
- Reassemble.
- Pressure-test the keg.
- Sanitize before filling.
This is especially useful when switching between beverages, troubleshooting a contamination problem, or preparing a keg that has been sitting for a long time.
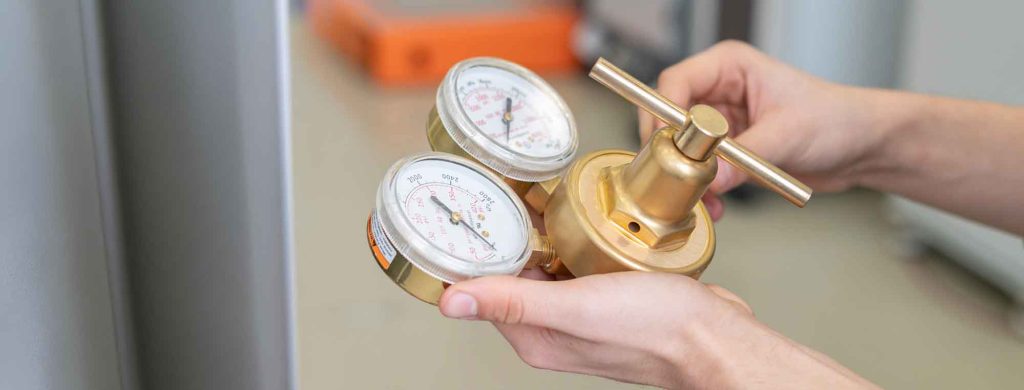
Pressure-Test the Keg
After reassembly, add a small amount of CO₂ pressure. Listen for leaks.
Check:
- Lid
- Gas post
- Liquid post
- Pressure-relief valve
You can use a leak-detection solution, like soapy water in a spray bottle, if necessary.
If the keg cannot hold pressure, find the problem before filling it with beer. A leaking keg is much easier to fix when it is empty.
Common Keg-Cleaning Mistakes
Only rinsing the keg
A rinse removes loose residue.
It does not replace a proper cleaning.
Fix: Use an appropriate cleaner.
Sanitizing a dirty keg
Sanitizer is not a dirt remover.
Fix: Clean first.
Never removing the posts
Beer residue can collect inside the posts, poppets, and dip tubes.
Fix: Perform regular deep teardowns.
Ignoring the O-rings
A dirty or damaged O-ring can cause leaks and retain odors.
Fix: Inspect the seals regularly.
Using too much keg lube
A giant blob of grease is not better than a thin film.
Fix: Use a small amount.
Using the wrong lubricant
Random household grease is not appropriate for brewing equipment.
Fix: Use food-safe keg lubricant intended for the application.
Overtightening the posts
More force does not always create a better seal.
Fix: Tighten the posts securely without excessive force.
Scrubbing stainless steel aggressively
Deep scratches can make equipment harder to clean.
Fix: Start with soaking and use appropriate soft brushes.
Forgetting the beer line
The keg can be perfectly clean while the beer line is filthy.
Fix: Clean the entire draft path.
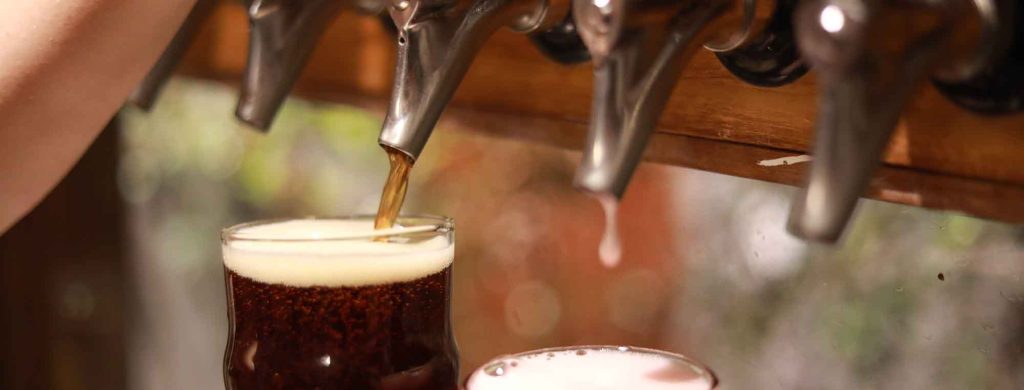
Do Not Forget the Beer Line
Beer line cleaning is part of keg cleaning.
After a keg kicks, clean the:
- Liquid disconnect
- Beer line
- Faucet
- Faucet shank
Beer residue can remain in the line. A clean keg connected to a dirty beer line can still produce contaminated beer. Clean the draft system regularly.
What About the Gas Line?
The gas side usually sees less beer than the liquid side. However, a contaminated keg can send beer or foam into the gas system.
If beer reaches the gas line, clean the affected components. Inspect the gas disconnect and tubing.
What About Hop-Heavy Beer?
Hops can leave sticky resin and plant material behind. IPAs may require more cleaning than a light lager.
Rinse the keg immediately. Do not let hop residue dry. Soak the keg with an appropriate cleaner.
Clean the liquid post and dip tube carefully. These parts can collect hop material and cause flow problems.
What About Cider, Mead, and Wine?
The cleaning process is basically the same.
Cider can leave:
- Apple residue
- Yeast
- Pectin
- Sugars
Mead can leave:
- Honey residue
- Yeast
- Fruit material
Wine can leave:
- Fruit solids
- Yeast
- Tartaric deposits
The residue changes. The basic cleaning process does not:
Rinse → clean → disassemble → clean parts → rinse → inspect → reassemble → sanitize.
Bottom Line
A keg does not need complicated maintenance, it needs consistent maintenance.
After every batch:
Rinse it. Clean it. Inspect it.
Regularly:
Take the posts and dip tubes apart. Clean the poppets. Check the O-rings.
When needed:
Replace damaged seals.
Use keg lube as a thin film on appropriate O-rings to help them seat without twisting.
And remember the most important distinction:
Cleaner removes dirt. Sanitizer reduces microorganisms.
A clean keg is not automatically sanitary. A sanitized dirty keg is not clean. Do both.
Clean the keg while the beer is still fresh in your memory. Future you will be very glad you did.