If your recipe says you should get an original gravity of 1.050, but your wort comes out at 1.042, you may have an efficiency problem.
Mash efficiency measures how much of the available sugar in your grain makes it into your wort.
Low mash efficiency is common for new all-grain brewers. It does not mean you did something terribly wrong. Small changes to your grain crush, water volume, temperature, sparge, and lautering process can make a large difference.
The good news is that you usually do not need expensive equipment to improve mash efficiency.
What Is Mash Efficiency?
Grain contains starch. During the mash, enzymes convert that starch into sugars. You then separate the sugary wort from the grain.
Mash efficiency measures how much of the potential extract from the grain you recovered in the wort. For example, imagine that your grain bill contains enough potential extract to produce a wort of 1.060 at your target volume.
If you collect enough sugar to produce 1.050, your efficiency is roughly:
1.050 ÷ 1.060 = 83%
This is a simplified example. Actual efficiency calculations use the potential extract of each grain and the volume of wort.
The important idea is simple: more of the grain’s available sugar in the wort = higher efficiency.
Mash Efficiency vs. Brewhouse Efficiency
You may see several different efficiency numbers in brewing software. These numbers do not all measure the same thing.
Mash efficiency measures how well you extract sugar from the grain during mashing and lautering.
Brewhouse efficiency measures how much of that extract makes it into the finished volume of wort going into the fermenter.
You can have good mash efficiency but poor brewhouse efficiency.
For example:
- You extract plenty of sugar from the grain.
- You leave a lot of wort behind in the kettle.
- You lose wort to hops or trub.
- Your fermenter receives less wort than expected.
Your mash efficiency can be good while your brewhouse efficiency is lower.
This guide focuses on mash efficiency.

What Efficiency Should I Get?
There is no single correct efficiency number. Many homebrewers see mash efficiencies around 70–85%. Some systems consistently achieve higher numbers. Others produce lower numbers. The important thing is consistency.
If your system gets 72% efficiency every time, you can build recipes around 72%. If your system gets 85% one time and 62% the next time, consistency is a bigger problem than the average number.
Do not chase a specific efficiency number just because another brewer gets it. A small increase in efficiency is not automatically better beer. And your mash efficiency is not something to hang your ego on, I promise.
The Biggest Factor: Grain Crush
Your grain crush is one of the most important factors in mash efficiency. The goal is to crack the grain open so that water can reach the starch inside. The husk should remain useful enough to help form a grain bed.
If the grain is crushed too coarsely, some of the interior starch remains trapped inside the grain. If the grain is crushed extremely fine, you can create other problems.
A very fine crush can:
- Slow the runoff.
- Create a compact grain bed.
- Increase the risk of a stuck mash.
- Make sparging difficult.
For most homebrew systems, you want a fine but usable crush.
What Does a Good Crush Look Like?
You should see:
- Cracked grain kernels.
- Exposed interior material.
- Mostly intact husk pieces.
- Very little completely uncrushed grain.
- Some flour.
You do not need every kernel turned into powder. Your goal is to expose the starch.
If You Buy Pre-Crushed Grain
Ask the shop what mill setting they use. If your efficiency is consistently low, compare your results with a finer crush. Some homebrew shops will adjust the crush for you.
If you buy grain and mill it yourself, you have much more control. And honestly, milling grain is fun.

Mash Temperature Matters
Your mash temperature affects enzyme activity. The enzymes that convert starch into fermentable sugars work best within specific temperature ranges.
For a typical beer mash, around 148–156°F (64–69°C) is a useful general range. The exact temperature depends on the beer you are making.
Lower mash temperatures generally produce wort with a higher proportion of fermentable sugars. Higher mash temperatures generally produce wort with more dextrins and a fuller body. Temperature also affects how quickly and completely conversion happens.
The Important Part
Do not assume that your mash is at the temperature shown on your recipe.
Measure it. Your thermometer may be inaccurate. Your mash tun may lose heat. Your grain may have started at a different temperature than expected. Your strike water calculation may be wrong.
Check the temperature in several locations in the mash – and stir before taking the reading. A mash can have hot and cold areas if the grain and water are not mixed well.
Mix the Mash Well
When you add grain to your strike water, you want all of the grain to become hydrated. Dry pockets of grain are a problem, as they contain starch that the enzymes cannot easily reach.
Add the grain while mixing the water. Break up clumps. Scrape around the bottom and edges of the mash tun and make sure there are no dry balls of grain.
After mixing, let the mash rest for a few minutes and check the temperature again. If you find a large temperature difference, mix the mash again.
Do Not Just Pour Grain on Top
A common beginner mistake is to dump the grain into the strike water, stir briefly, and close the mash tun.
The top of the mash may look fine while the bottom contains dry grain. Good mixing gives the enzymes better access to the starch.
Give the Mash Enough Time
Most beer mashes take about 60 minutes.
Some recipes use shorter or longer mash times. The exact time is not usually the biggest efficiency problem. A poorly mixed mash with a perfect 60-minute timer is still a poorly mixed mash.
If you have low efficiency, check your crush and mash mixing before assuming that you need a two-hour mash.

Check for Conversion
A mash is not finished simply because the timer says 60 minutes. You can test conversion with an iodine test.
Iodine changes color in the presence of starch. If iodine shows that starch is still present, the mash may need more time or may have another problem.
Do not put iodine into the entire mash. Take a small sample and test it separately.
You can also use your hydrometer readings and brewing software to monitor your process over time.
For most beginners, however, improving the crush and mixing well will provide more useful information than performing complicated conversion tests.
Use the Right Amount of Water
Mash thickness affects how the mash behaves.
A common starting point is roughly:
1.25–1.5 quarts of water per pound of grain
That is not a universal rule. Your equipment and recipe may require something different.
Too little water can make the mash difficult to mix. Too much water can reduce the amount of water available for sparging and change your process. The important thing is to understand where your water is going.
Some water stays in the grain. Some remains in the mash tun. Some is lost to evaporation. The rest becomes wort.
You need to account for all of these losses when planning your brew.
Grain Absorbs Water
Grain does not give all of your mash water back.
A useful homebrew estimate is around:
0.15 gallons of water absorbed per pound of grain
For example, 10 pounds of grain may retain roughly:
10 × 0.15 = 1.5 gallons
Your actual absorption can vary. This matters because a large grain bill can hold a surprising amount of wort. If you do not account for this loss, you may collect less wort than expected.
Sparging Can Improve Extraction
After the mash, a significant amount of sugar remains in the grain.
Sparging rinses the grain with additional water and removes more of that sugar.
There are several ways to sparge, see our complete guide on the topic.
Do Not Sparge With Extremely Hot Water
Very hot sparge water can create problems. As the grain bed becomes less acidic during sparging, very high temperatures can increase the extraction of tannins and other compounds.
A common target is around 168°F (76°C) for sparge water.
You do not need to hit exactly 168°F. Avoid treating 168°F as a magic number. The important point is to avoid excessively hot sparging, especially when the grain bed pH is high.
Mash pH Matters
Mash pH affects enzyme activity and the overall mash process.
A common target for the mash is roughly pH 5.2–5.6 measured at mash temperature or corrected according to the method used.
You do not need to obsess over the number on your first all-grain brew. However, if you consistently have poor efficiency, mash pH is worth checking. Water chemistry can change mash pH significantly. This is especially important when brewing very pale beers or very dark beers because different malts affect mash chemistry differently.
Do Not Add Acid Without Measuring
A common mistake is to see a low-efficiency problem and immediately add acid. Do not do this blindly.
Measure your water and mash pH first.
If you are using reverse-osmosis water, you also need to understand that RO water contains very little mineral content. You may need to build the water profile for the beer you are making.
Stir During the Mash
You do not need to constantly stir your mash. But stirring once or twice can help if your system has temperature or mixing problems – especially for brew-in-a-bag.
Stirring can:
- Break up dry pockets.
- Even out temperature.
- Improve contact between water and grain.
- Help expose starch to enzymes.
If your mash tun loses very little heat and your mash is already well mixed, constant stirring is unnecessary.
Lautering Matters Too
After conversion, you need to separate the wort from the grain. This is called lautering. Your goal is to collect wort efficiently without compacting the grain bed.
Open the runoff valve slowly at first. Let the grain bed settle. Then increase the flow as your system allows.
If you drain the mash extremely fast, the grain bed can compact. This can cause a stuck sparge or channeling.
Watch for Channeling
Channeling happens when sparge water finds an easy path through the grain bed.
Instead of washing evenly through the grain, the water follows a small number of channels. Some grain gets rinsed heavily. Other grain gets very little water. This reduces extraction.
Fly sparging systems are particularly sensitive to channeling. Keep the water level above the grain bed and distribute sparge water evenly.
For batch sparging, thorough stirring reduces this problem.
Do Not Leave a Lot of Wort Behind
A surprising amount of sugar can remain in the grain bed if you stop collecting wort too early. If your system allows it, measure the gravity of your final runnings. As the sparge continues, the gravity drops. You can stop based on your planned volume, your process, or your runoff gravity.
Do not chase every last bit of sugar. Very low-gravity runoff can contribute more problems than benefits, especially if the grain bed pH rises.
For a beginner, hitting your planned pre-boil volume consistently is usually more useful than trying to extract every possible point of gravity.

Measure Your Pre-Boil Gravity
This is one of the best ways to troubleshoot efficiency. Do not wait until fermentation is finished.
Measure the gravity of the wort before the boil.
You can then compare expected pre-boil gravity with actual pre-boil gravity.
If your pre-boil gravity is already low, the problem happened during the mash or lautering process. If your pre-boil gravity is correct but your original gravity is low, the problem happened later.
For example:
- Mash conversion: good
- Lautering: good
- Pre-boil gravity: correct
- Boil: shorter than planned
- Final volume: higher than planned
- Original gravity: low
That is not a mash efficiency problem. It is a volume and boil problem.
Check Your Volumes
Volume errors can make efficiency look worse than it really is.
Imagine you expect 5 gallons of wort but actually have 5.5 gallons. The same amount of sugar is now spread through more water. The gravity will be lower. This can make you think your mash failed.
Measure your volumes. Mark your kettle.
Learn how much your system loses to:
- Grain absorption
- Mash tun dead space
- Kettle dead space
- Boil evaporation
- Hops
- Trub
- Transfer losses
Your brewing system has its own numbers. Learn those numbers.
The Most Common Causes of Low Efficiency
If your efficiency is low, check these first.
| Problem | What It Does | What to Check |
| Grain is too coarse | Starch stays trapped | Finer crush |
| Poor mash mixing | Dry grain does not convert | Stir thoroughly |
| Incorrect mash temperature | Enzymes work poorly | Measure temperature |
| Not enough conversion time | Starch remains | Check conversion |
| Poor sparging | Sugar remains in grain | Improve sparge |
| Channeling | Water misses some grain | Improve water distribution |
| Too much grain absorption | Wort stays in grain | Account for absorption |
| High mash pH | Can affect conversion and tannin extraction | Measure pH |
| Incorrect volume | Gravity appears too low | Measure volumes |
| Incorrect efficiency setting | Recipe prediction is wrong | Update brewing software |
What Should I Change First?
Do not change five things at once.
If you change everything, you will not know what fixed the problem. Start with the simplest variables.
Step 1: Check Your Grain Crush
Ask for a finer crush or adjust your mill.
This is often one of the easiest ways to improve efficiency.
Step 2: Mix the Mash Thoroughly
Make sure every grain kernel is wet.
Break up dry clumps. Check the temperature in several places.
Step 3: Measure Your Water and Volumes
Do not estimate.
Measure strike water, pre-boil volume, and measure post-boil volume.
Step 4: Measure Pre-Boil Gravity
This tells you whether your extraction is working.
Step 5: Check Mash pH
If the basic process is working but efficiency remains poor, check mash pH.
Step 6: Look at Your Sparge
If you still have a lot of sugar in the grain, improve your sparging method.
What If My Efficiency Is Too High?
This can also happen. Suppose your recipe is designed for 72% efficiency but your system consistently gets 85%. Your original gravity may be much higher than expected.
That can change:
- ABV
- Bitterness balance
- Body
- Fermentation performance
- Flavor
You do not necessarily need to reduce your efficiency. Instead, adjust your recipe to match your actual system. Your brewing software should have an efficiency setting.
If your system consistently gets 80%, use 80%. Do not keep designing recipes around 70% and then wonder why your beer is too strong.
Can I Just Add More Grain?
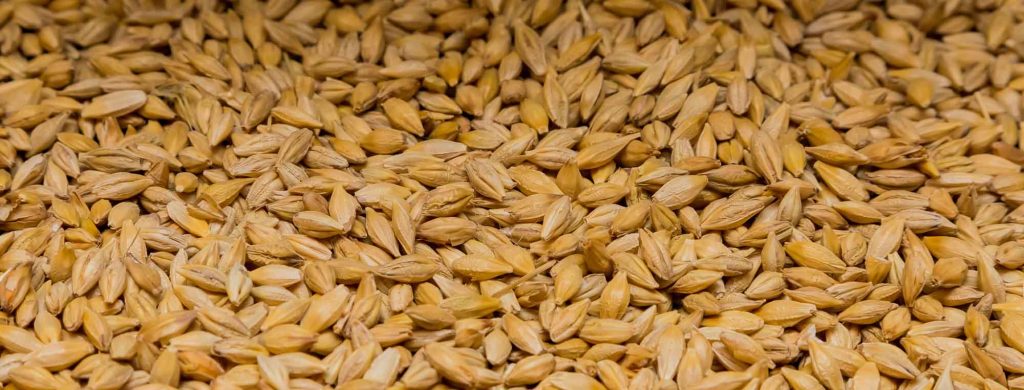
Yes. If your system consistently produces lower efficiency than the recipe expects, you can increase the grain bill.
For example, if a recipe assumes 75% efficiency and your system gets 65%, you may need more grain to reach the same original gravity.
This is not a failure. Recipe efficiency is an assumption, and your system has its own efficiency. Once you know your number, you can design around it.
Efficiency Is Not the Same as Beer Quality
This is important. A beer with 85% efficiency is not automatically better than a beer with 70% efficiency.
Higher efficiency can reduce ingredient cost by a small amount. It can also help you hit your target gravity. But efficiency is only one part of brewing.
You still need:
- Good fermentation.
- Good yeast health.
- Correct fermentation temperature.
- Good sanitation.
- Good water chemistry.
- Good recipe design.
- Good packaging.
Do not ruin a perfectly good brew day trying to squeeze five more points of gravity from the grain.
A Simple Efficiency Troubleshooting Example
Imagine your recipe predicts:
- Pre-boil volume: 6.5 gallons
- Pre-boil gravity: 1.040
- Post-boil volume: 5 gallons
- Original gravity: 1.052
You measure:
- Pre-boil volume: 6.5 gallons
- Pre-boil gravity: 1.032
Your extraction is already low before the boil. Look at the mash and lautering process.
Now imagine instead that you measure:
- Pre-boil volume: 6.5 gallons
- Pre-boil gravity: 1.040
- Post-boil volume: 5.5 gallons
- Original gravity: 1.047
Your mash extraction was fine. You simply did not concentrate the wort as much as expected. That is a boil and volume issue, not a mash issue. This is why measuring pre-boil gravity is so useful.
Should I Use Rice Hulls?
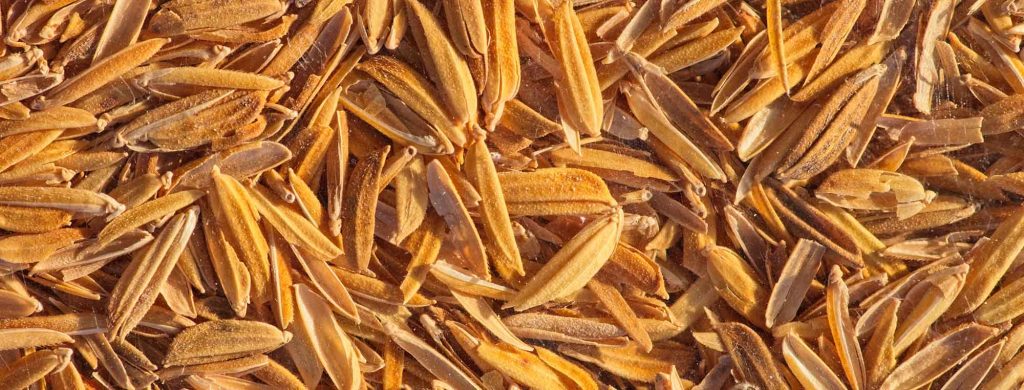
Rice hulls do not increase mash efficiency directly. They help improve the physical structure of the grain bed.
This can make lautering easier, especially with:
- Wheat-heavy recipes.
- Rye-heavy recipes.
- Oat-heavy recipes.
- Very high percentages of adjuncts.
Rice hulls can reduce the chance of a stuck mash. They do not magically create more sugar.
Should I Mash Longer?
Usually, this is not the first thing to change. If your grain is crushed properly and the mash is well mixed, a normal mash period is often enough for conversion. A longer mash can help in some situations.
But if your efficiency is very low, look at:
- Grain crush.
- Mash mixing.
- Mash temperature.
- Mash pH.
- Sparging.
- Volume measurements.
…before simply adding more time.
Should I Mash at a Higher Temperature?
Not to increase efficiency. Mash temperature primarily changes the types of sugars and dextrins produced.
A higher mash temperature can create a fuller-bodied beer, while a lower mash temperature can create a more fermentable wort. Do not change mash temperature simply because you want a higher efficiency number. Choose the temperature based on the beer you want.
The Bottom Line
If your mash efficiency is low, do not panic.
Start with the basics.
- Crush the grain well.
- Mix the mash thoroughly.
- Measure the mash temperature.
- Use enough water.
- Sparge effectively.
- Measure pre-boil gravity.
- Check mash pH if problems continue.
Most importantly, learn how your own brewing system behaves. You do not need to hit 90% efficiency. You need to know what your system normally does.
If your system consistently produces 75% efficiency, design your recipes for 75%. Then improve the process one variable at a time.
Consistent brewing is more useful than chasing a perfect efficiency number.