Kegging is one of the easiest ways to carbonate homebrew.
You do not need to wait one to three weeks for bottle conditioning. With a keg, you can add carbon dioxide directly to the beer.
There are several ways to carbonate a keg. And they work for mead, wine, and cider – not just beer.
If you want the fastest reliable method, use forced carbonation with cold beer, high pressure, and agitation.
You can often have a keg carbonated in a few hours. For the best balance between speed and consistency, however, it is usually better to allow the beer to carbonate under pressure for several hours or overnight.
What You Need
For keg carbonation, you need:
- Cornelius keg
- Carbon dioxide tank
- CO₂ regulator
- Gas disconnect
- Beer disconnect
- Beer line
- Faucet
- Keg cleaner
- No-rinse sanitizer
- Refrigerator or kegerator (and you can build your own kegerator)
- Carbonation chart or calculator
You also need a way to keep the keg cold. A cold keg carbonates much more easily than a warm keg.
The Basic Process
The fastest process is:
- Finish fermentation.
- Confirm stable final gravity.
- Transfer the beer to a clean, sanitized keg.
- Remove oxygen from the keg.
- Chill the beer.
- Connect CO₂.
- Set the regulator to the required pressure.
- Agitate the keg.
- Allow the beer to absorb CO₂.
- Reduce the pressure to serving pressure.
- Serve.
The key is cold beer.
Carbon dioxide dissolves into cold beer much more easily than warm beer.
Make Sure Fermentation Is Finished
Do not carbonate beer that is still actively fermenting unless you are intentionally using a controlled spunding process.
Take hydrometer readings on different days. The specific gravity should remain stable. If the gravity is still decreasing, the yeast is still fermenting, so wait until fermentation is complete.
This is especially important when kegging. A keg can hold pressure much more effectively than a fermentation vessel. Continued fermentation can produce more pressure than expected.
Transfer the Beer to the Keg
Clean and sanitize the keg before use.
Transfer the beer carefully. Avoid splashing, as oxygen can damage beer after fermentation.
If possible, use a closed transfer from the fermenter to the keg. If you do not have equipment for a closed transfer, carefully siphon the beer into the keg.
Leave a small amount of headspace. Do not fill the keg completely.
Purge the Keg
Oxygen is the enemy of fresh beer. Before filling the keg, purge it with carbon dioxide if possible.
An easy method is to:
- Clean and sanitize the keg.
- Fill the keg with sanitizer.
- Push the sanitizer out with CO₂.
- Leave the keg full of CO₂.
- Transfer the beer into the purged keg.
This gives you a keg that contains mostly CO₂ before you add the beer. You can also purge the headspace after filling:
- Connect the CO₂.
- Pressurize the keg.
- Pull the pressure-relief valve.
- Repeat several times.
This reduces the oxygen concentration in the headspace.
Chill the Beer
Chill the keg before you carbonate it.
A temperature of about 35–40°F (2–4°C) is a good starting range for most beers. Colder beer absorbs CO₂ more easily. Do not try to carbonate warm beer with the same pressure that you would use for cold beer. The required pressure changes with temperature.
Choose Your Carbonation Level
Different beers need different amounts of carbonation.
Typical examples include:
- British ales: lower carbonation
- American ales: moderate carbonation
- Lagers: moderate carbonation
- Wheat beers: higher carbonation
- Belgian-style beers: often higher carbonation
You do not need to guess. Use a carbonation chart or calculator.
Your target depends on:
- Beer temperature
- Desired carbonation level
- CO₂ pressure
The Fastest Method: Force Carbonation With Agitation
If you want beer as quickly as possible, agitation can greatly increase the rate at which CO₂ dissolves.
Start with cold beer:
- Connect the CO₂.
- Set the regulator to an appropriate carbonation pressure, as high as 30 PSI.
- Leave the beer alone for 30 minutes.
- Disconnect the gas line.
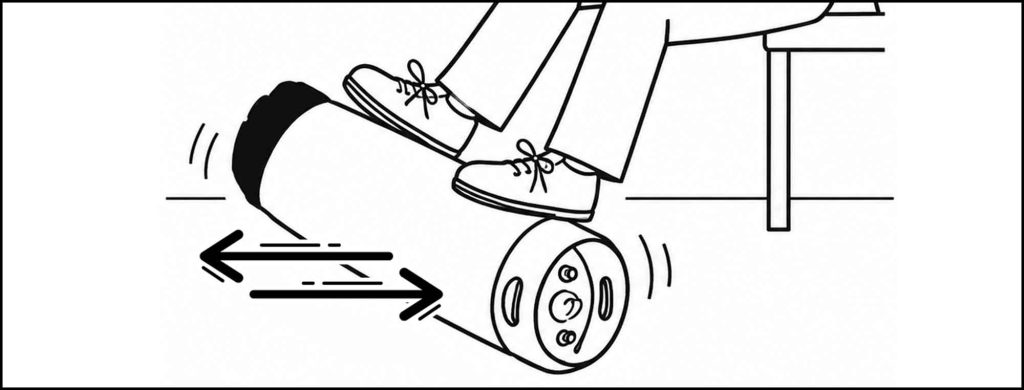
- Then gently rock or shake the keg for 20-30 minutes.
The agitation increases contact between the beer and the CO₂.
Afterward, let the keg rest while the beer absorbs the gas. After an hour or so, slowly release the pressure release valve. Set the pressure to a serving pressure (usually 5-10 PSI) and leave it alone for an hour.
Then pour a sample. If it is not fully carbonated, repeat the process. This usually will take between 1-3 “logrolling” sessions to carbonate the beer.
Do Not Shake an Overpressurized Keg
Do not blindly turn the regulator to an extremely high pressure and shake the keg.
This can cause overcarbonation. It can also create a very foamy beer.
Use a reasonable carbonation pressure and don’t pressurize or shake too much. A controlled approach is safer and easier to repeat.
A Fast Carbonation Schedule
For a typical ale served at about 38°F, a practical fast-carbonation process is:
- Chill the keg completely.
- Connect CO₂.
- Set the regulator to your target carbonation pressure.
- Gently rock the keg for several minutes.
- Stop the agitation.
- Let the keg sit cold.
- Check the carbonation.
- Repeat briefly if necessary.
The beer may be drinkable within a few hours. It may not be at its best immediately.
Allowing the keg to sit overnight often gives better results.

The Overnight Method
If you can wait until the next day, there is an easier method.
- Chill the keg.
- Set the CO₂ regulator to the pressure required for your desired carbonation level (usually 20-30 PSI).
- Leave the keg connected to CO₂ overnight.
- The beer slowly absorbs CO₂.
In the morning, slowly release the pressure release valve. Set the pressure to a serving pressure (usually 5-10 PSI) and leave it alone for an hour.
Then pour a sample. If it is not fully carbonated, repeat the process.
This method is slower than agitation. But it is also much harder to overcarbonate. For many homebrewers, this is the best compromise between speed and simplicity.
The Set-and-Forget Method
The simplest method is also the slowest. Again, begin with cold beer.
- Connect the keg to CO₂.
- Set the regulator to serving pressure (usually 5-10 PSI).
- Leave the keg cold and connected.
- The beer gradually reaches equilibrium with the CO₂ pressure.
- This can take several days up to a week.
The advantage is consistency. You do not need to shake the keg. You do not need to repeatedly adjust the pressure.
You simply wait.
Which Method Is Fastest?
| Method | Typical Time | Difficulty | Risk of Overcarbonation |
| Agitation | A few hours | Moderate | Higher |
| High-pressure burst | Several hours | Moderate | Higher |
| Overnight carbonation | Overnight | Easy | Moderate |
| Set and forget | Several days | Very easy | Low |
The exact carbonation time varies.
Beer temperature, pressure, keg geometry, beer volume, and agitation all affect how quickly CO₂ dissolves.
What About the “30 PSI for 24 Hours” Method?
You may see a common recommendation to set the keg to around 30 PSI for 24 hours.
This can carbonate beer quickly. It can also produce inconsistent results.
The correct pressure depends on temperature and the carbonation level you want. A fixed pressure is not appropriate for every beer.
If you use a high-pressure method, reduce the pressure to the appropriate serving pressure afterward.
What About the “Shake at 30 PSI” Method?
This is another common homebrewing shortcut.
It can carbonate beer very quickly. It also makes it easy to overshoot your target, as you’re shaking while connected to high-pressure CO₂.
If you use agitation:
- Keep the beer cold.
- Use a reasonable pressure.
- Agitate gently.
- Check the carbonation.
- Stop when the beer reaches the desired level.
You do not need to shake the keg violently.

How to Fix Overcarbonated Beer
If you carbonate the beer too much, do not panic. You can reduce the pressure.
- Disconnect the CO₂.
- Pull the pressure-relief valve.
- Allow some CO₂ to escape.
- Repeat as necessary.
Then reconnect the CO₂ at the correct serving pressure. It can take time for excess CO₂ to leave the beer.
Do not repeatedly vent the keg without giving the beer time to reach equilibrium.
How to Avoid Foamy Beer
Carbonation is not the only cause of foam.
A beer can pour badly because of:
- Warm beer
- Warm beer lines
- Incorrect serving pressure
- Beer line that is too short
- Dirty beer lines
- Incorrect faucet setup
- Excessive carbonation
- Temperature changes
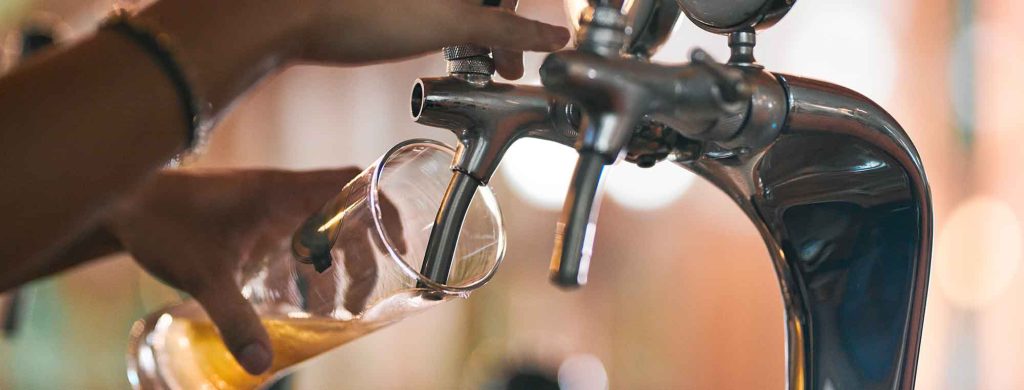
Keep the entire beer path cold.
This includes:
- Keg
- Beer line
- Faucet
A cold keg with a warm beer line can still produce excessive foam.
Serving Pressure Is Not Always the Same as Carbonation Pressure
Once the beer reaches the desired carbonation level, you normally reduce the regulator to your serving pressure.
The exact pressure depends on your system. Do not simply use the lowest possible pressure.
You need enough pressure to push the beer through the beer line without causing carbonation to fall out of solution.
A balanced draft system uses the appropriate combination of:
- Beer temperature
- CO₂ pressure
- Beer-line length
- Beer-line diameter
- Faucet
Do Not Confuse Pressure With Carbonation
A common beginner mistake is to think that high pressure always means highly carbonated beer. It does not.
Carbonation depends on the relationship between:
- CO₂ pressure
- Beer temperature
- Time
Cold beer at a given pressure contains more dissolved CO₂ than warm beer at the same pressure. That is why carbonation charts use both temperature and pressure.
Can You Carbonate a Warm Keg?
Yes, but it is not the fastest or easiest approach.
Warm beer requires more pressure to reach the same carbonation level. It also makes the beer more likely to foam during serving.
Chill the beer first. This is one of the easiest ways to make keg carbonation faster and more predictable.
Can You Carbonate While the Beer Is Still in the Fermenter?
Yes. A pressure-capable fermenter can allow you to carbonate beer before transferring it to the keg.
This is called spunding when natural fermentation produces the carbonation. It requires equipment that is designed to safely hold pressure. Do not attempt this with a normal bucket, glass carboy, or other fermenter that is not pressure-rated.
For beginners, force carbonation in a keg is usually simpler.
Do You Need a Carbonation Stone?
No. A carbonation stone can increase the surface area available for CO₂ absorption, and it can be useful in some kegging systems.
However, you do not need one to carbonate beer quickly. A cold keg, correct CO₂ pressure, and agitation are enough.

The Simplest Fast Method
For a beginner who wants beer ready quickly, use this process:
- Finish fermentation.
- Transfer the beer to a sanitized keg.
- Purge the keg with CO₂.
- Chill the keg to about 35–40°F.
- Connect CO₂.
- Set the regulator to the pressure required for your target carbonation.
- Gently rock the keg for several minutes.
- Let the keg rest cold.
- Check the carbonation after a few hours.
- Reduce to serving pressure.
- Serve.
If the beer is not carbonated enough, give it more time or repeat a short agitation cycle.
If you can wait overnight, skip the shaking and leave the keg connected to CO₂ at the correct pressure. That method is slower, but it is easier to control.
The Most Important Rule
Cold beer carbonates faster.
The fastest way to carbonate beer is not simply to turn the CO₂ regulator as high as possible.
It is to use:
Cold beer + appropriate CO₂ pressure + good gas contact + time.
For the fastest practical result, gently agitate a cold keg. For the easiest reliable result, chill the keg, set the correct pressure, and leave it connected overnight. And for the least work, use the set-and-forget method.
Once you understand the relationship between temperature, pressure, and carbonation, kegging becomes one of the simplest parts of homebrewing.